Horror

Tools Used:

3ds Max

Unreal Engine

Duration:

2 weeks

Role:

Concept and 2d sketches, design flow, modular model creation,
prop and texture placement, lighting, blueprint scripting

Overview:
The first project for Advanced Level Design class. Prompt was to create a completely enclosed space with a 1st person perspective.

My design goal of this project was to create a simple maze like level that had scripted horror elements. Playtesting helped with iteration as feedback allowed me to get the flow of the level as originally designed. Through the use of lighting, textures, and audio, I was able to successfully achieve my goal of creating an atmospheric horror level.

Download:
Horror

Professor Comments:

“Stellar work here. There is such a fine attention to detail. It really shows that you put crazy amounts of love and sweat into this project. I would have no problem recommending you for professional level design work if anyone asked me. It shows that you already have a master of the tools.”

– DePaul College of Computing and Digital Cinema
Features:

  • Five unique scripted sequences (blueprints)
  • Unique audio cues
    • Breathing
    • Footsteps
    • Atmosphere
    • Misc audio for props
  • Lightmaps
  • Post prossing

Props and textures provided by Epic Games.

Gameplay video highlighting the atmosphere and horror elements to the right:

Design Documentation

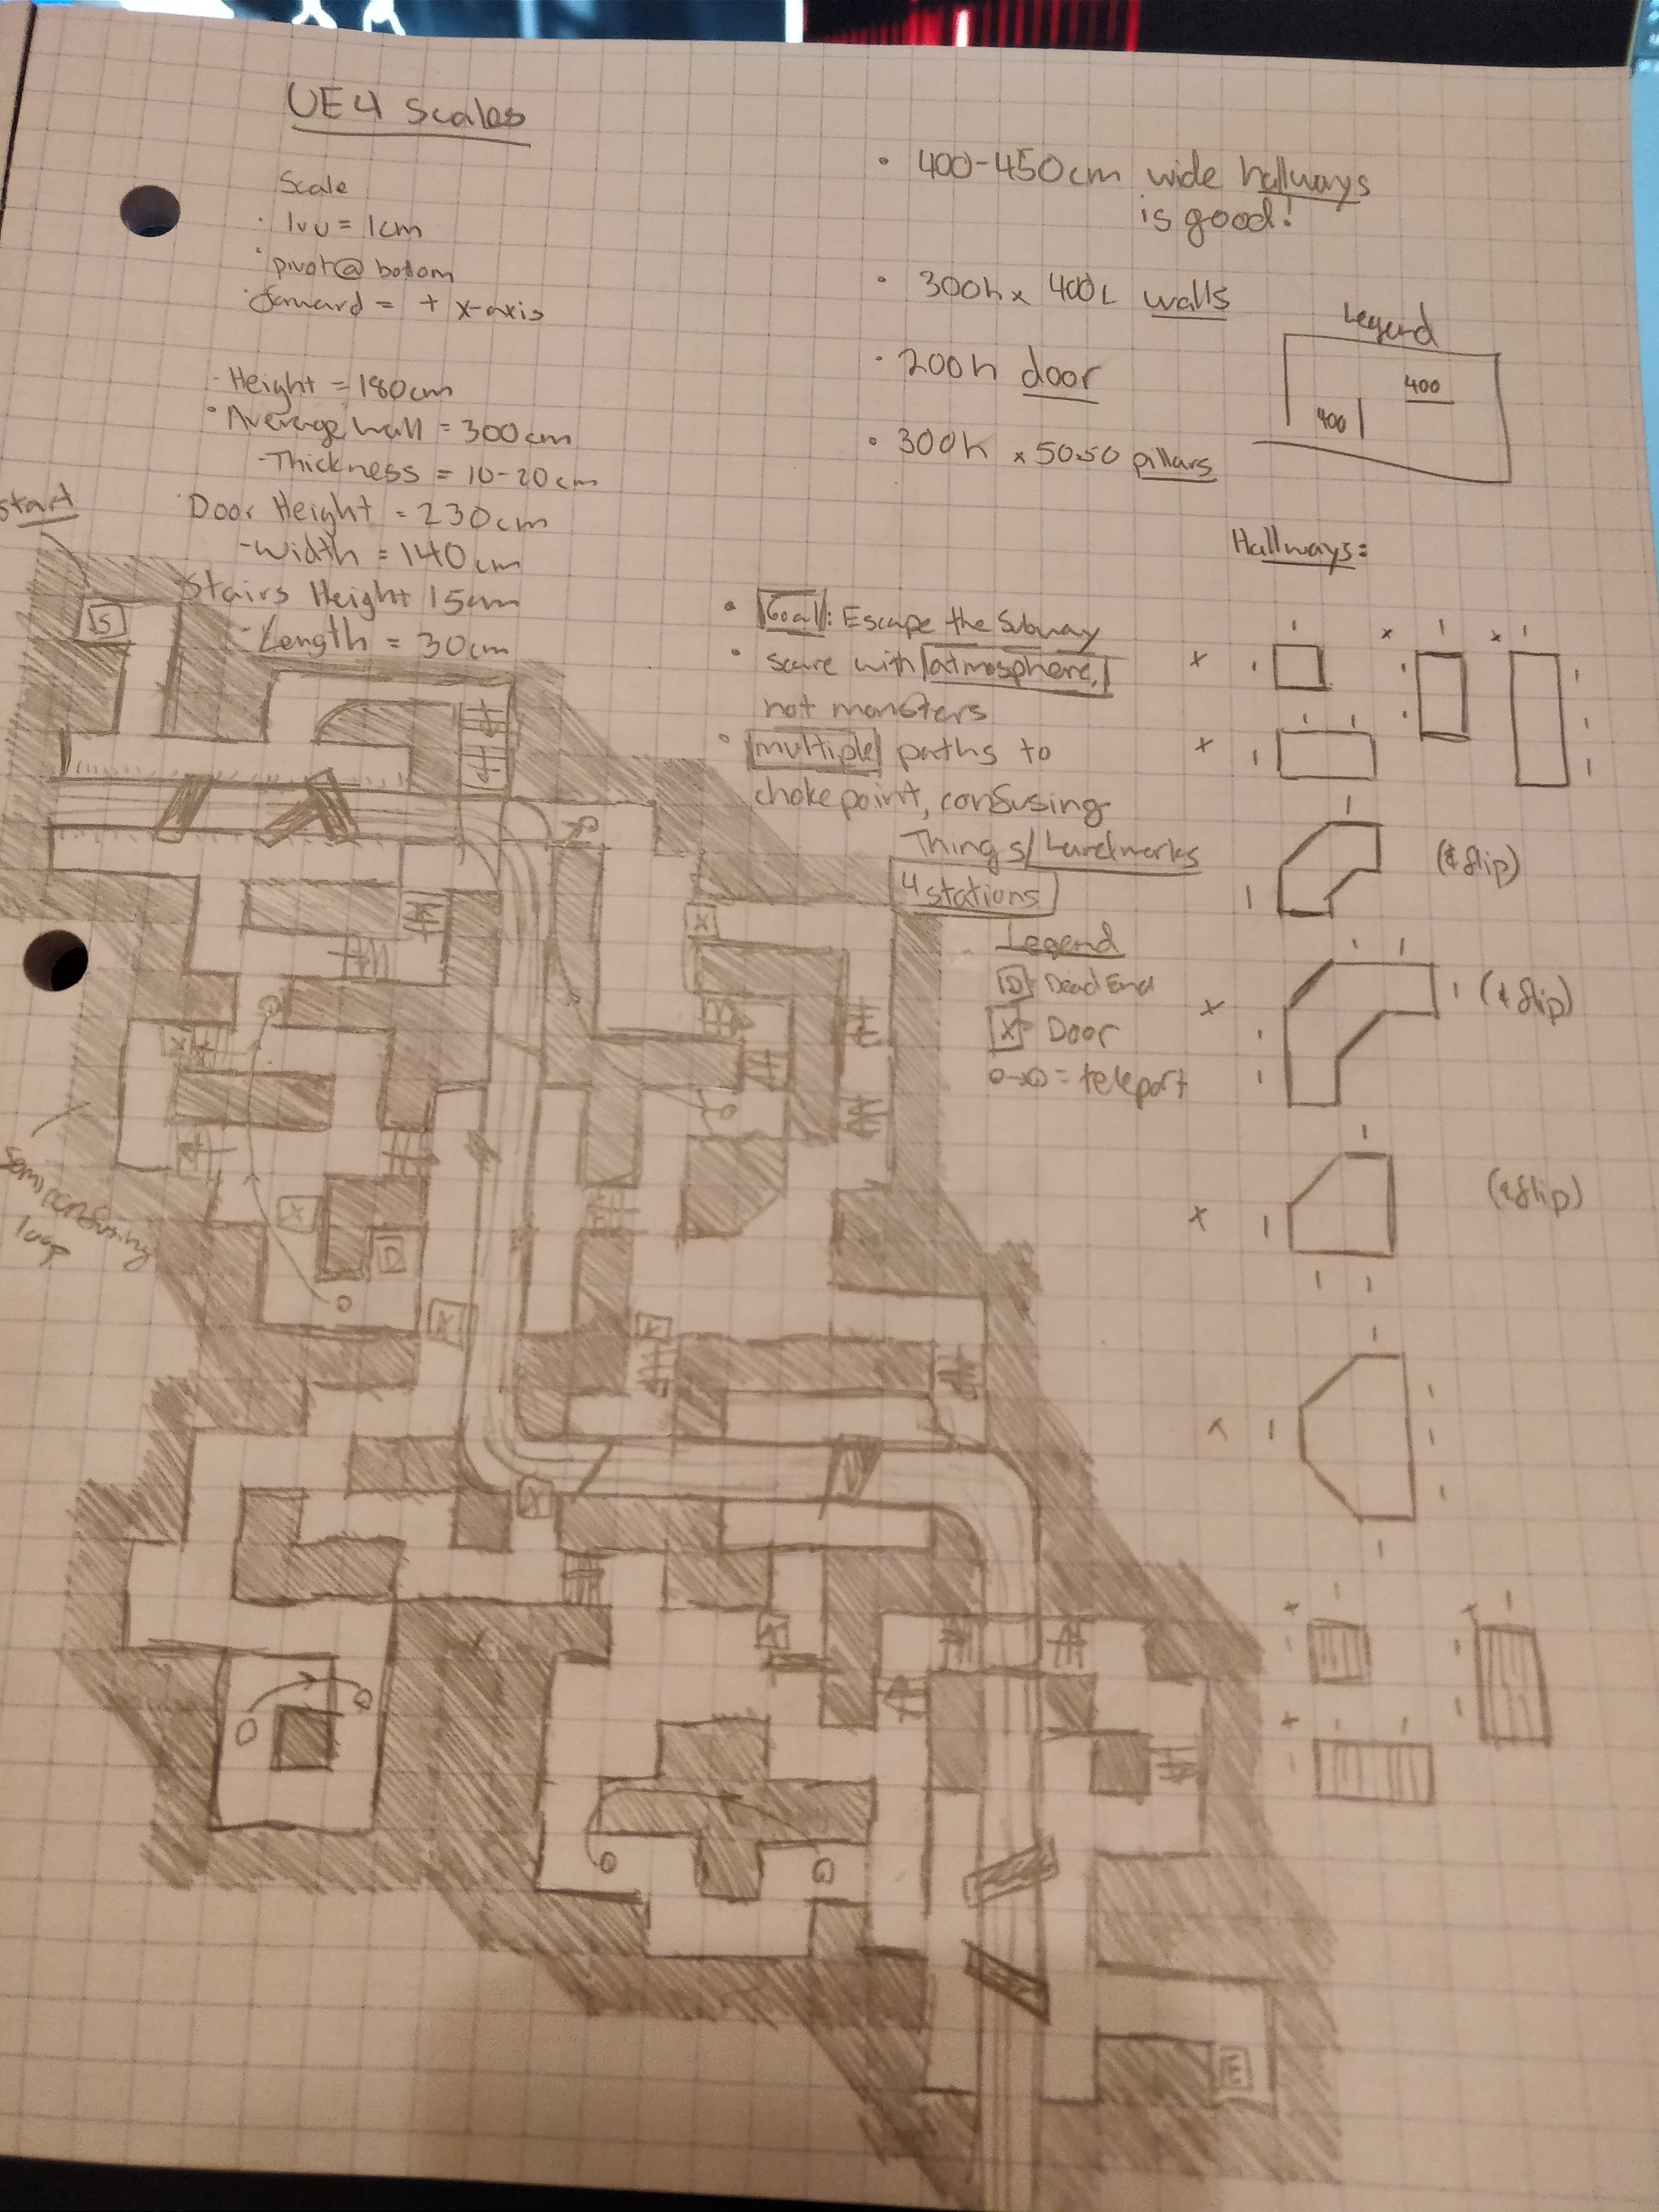
This was the second iteration my layout sketch went through. The first iteration was very small compared to this one as there was only about five minutes worth of content for the player. With only two major areas of interest and two alternate paths for the player, I wanted to make the level not only interesting, but more like a maze and immersive.

To make it maze-like, there are three main areas of interest that the player will get to no matter what path they choose. Each individual path eventually lead to each other and then into the point of interest, basically making a funnel. This gives the illusion of choice while keeping the player on task to get to the next area.

Planning out modular assets with scale standards allowed me to create the assets in 3ds max and layout the level inside of UE4 within a day, leaving more time for other mechanics, playtesting, and detailing.


Since this project had a deadline of two weeks, I had to cut some elements. One of these elements were “teleporters”. Certain areas that were dead ends would look like they continued on (render targets in UE4), but actually just took the player in a continuous loop. I had to cut these for multiple reasons, with one of them being that having just one cut the frames down to 5 per second as they were not optimized at all and I would rather have the level be exciting and scary than have a cool teleporter in it.

With more time, I would have liked to have created my own textures to differentiate the three different zones this level contained. While the stock UE4 assets provided a lot of help and detail, creating my own could have added my own personal touch to this level. I would have also liked to incorporate level streaming. The reason I did not is that I would have needed to iterate on certain areas to make sure the streaming was not visible to the player.

The Design Flow documentation can be downloaded here.

Copyright © 2026 Nick Verducci. All rights reserved.